DIY car silk and matt paint finishes
"Dull is the new shiny."

Matt finishes seem to be making a comeback and we've seen a few ways to achieve a matt finish from the application of film and vinyl wraps, to tins of spray paint.
Here is the DIY approach using tins of paint, one of our members fancied having a go and here is an opportunity to learn from his experience.
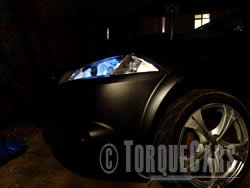
A TorqueCars member has taken his Megane, hired an industrial unit and spray painted his car.
When we asked him why, he told us that he was bored and wanted something to do.
Those who maintain that you cannot get a professional finish from a can will find it hard to fault his effort, who it must be noted has never spray painted a car before in his life.
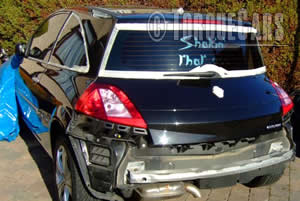
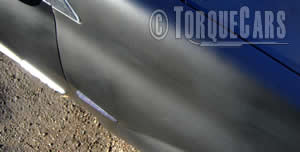
The finish is actually a silk finish; he doesn't like it being called matt.
A silk finish is fairly flat but will reflect a little light.
A matt finish is similar but pretty much non reflective.
The overall method for a matt finish is the same as shown here for silk paint only you will buy a specific matt paint.
Paint application works best on dry hot days and inside. Ensure that your work area is dust free as there is nothing more frustrating than a layer of dust embedded in your new paint. Sweep the area with water, including the walls. Then lay sheets of plastic, or paper over the floor and walls to help keep the dust out. (You will also avoid painting your work area as well!)
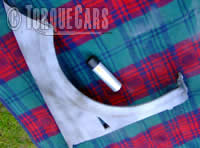
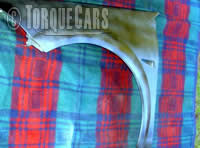
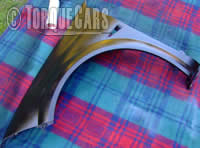
Have a practise run first. A front wing is usually the best. If this is the first time you have spray painted a car you must build the paint up in very fine layers. You will also need to avoid using the end of a tin as the last bit of paint is usually a bit globby and with the pressure drop in the tin you will suffer from splatters of paint.
Step 1) Preparing the car for paint.
Take your time and ensure that the surface to be painted is clean. You will need to remove the clear coat from the car, otherwise you will get a reflective finish and that is not what we are aiming at.
Using a 400 grit paper go over the entire car and remove the clear coat. Go over the car with white spirit to remove the dust and any grease (the no 1 enemy of a car painter!)
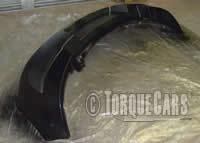
Step 2) Remove bumpers/panels
For most cars the job will be easier if you remove the bumpers and panels. It will also help you to avoid over spray marks and seams which show the original colour through.
Removing the bonnet and boot will enable you to overlap the new colour into the seams around the side of the bonnet. The underside of the bonnet should also be sprayed and this will necessitate the removal of the sound deadening material.
The inside of the boot will also need to be painted to match. You might get away with this if you are not making a major colour change but left undone it can look rather unsightly.
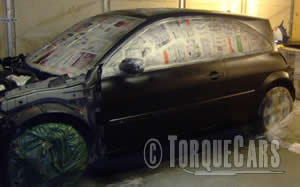
Step3) Masking off the car.
Take your time here, and use a good thick covering of newspapers, the last thing you want is for the paint to seep through the paper. Using newspaper, plastic bags, cling film and a heavy duty tape cover over the inner wheel arches/wheels, the windows and any parts of the door handles/locks that are not to be colour coded.
Step 4) Spraying the car.
Moving the tin over the panel at a distance of about 6 inches spray a fine mist of paint over the panel.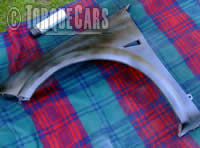
Allow an hour or so for this to dry and then apply a second, third fourth etc coat until the cars original paint colour is completely covered by the new paint. 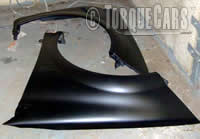
(Rather than wait an hour move on to a different panel or bumper, that way you will spray almost continually and not lose time waiting for the paint to dry.) Be very fussy and sand a panel back and spray it again if you are not happy with the coverage.
Step 5) Finishing the car.
 For a silk finish or matt finish go over the car with a fine grit of wet and dry. This will remove paint bobbles and specs that may have formed. You will not apply a clear coat and you must not under any circumstances wax the car.
Wash the car periodically with nothing other than a solution of washing up liquid. A matt or silk finish can be a challenge to keep clean as dirt will adhere more readily to it but it is certainly worth persevering with.

Notes from this Megane project owner, in total it took about 16 tins of paint to cover my car. Definitely take your time, I had a pretty nice even coverage so there was no need for a final sanding off.
To ask questions on this project or get some more paint tips join us in our friendly forum.
Please Check out my YouTube channel, we're regularly adding new content...
 Click to accept YouTube Cookies & Play.
Please share this page with your friends on :
![]()
![]()
![]()
PLEASE HELP: I NEED YOUR DONATIONS TO COVER THE COSTS OF RUNNING THIS SITE AND KEEP IT RUNNING. I do not charge you to access this website and it saves most TorqueCars readers $100's each year - but we are NON PROFIT and not even covering our costs. To keep us running PLEASE Donate here
If you liked this page please share it with your friends, drop a link to it in your favourite forum or use the bookmarking options to save it to your social media profile.
Feedback - What do You Think?
Please use our forums if you wish to ask a tuning question, and please note we do not sell parts or services, we are just an online magazine.
Help us improve, leave a suggestion or tip
Please watch this video and subscribe to my YouTube channel.